前言
在 React 组件中,大部分组件或多或少都会需要一下 状态, 来维持 & 切换自身的 UI 状态, 他可能是自身的 State, 也许是外部传递的 Props, 都可以作为自身 UI 的一个切换的控制开关。
整个数据流都是从上至下的单项数据流(State -> Props),
当层级跨越过深,又或者兄弟层级的时候状态传递会很复杂, 组件之间难以“互动”, 你可以将状态替身到一个上层 Container 进行管理然后分发给下面的组件(状态提升), 组件使用回调来改变上层数据, 当嵌套过多状态过多, 就不好办咯 ~。
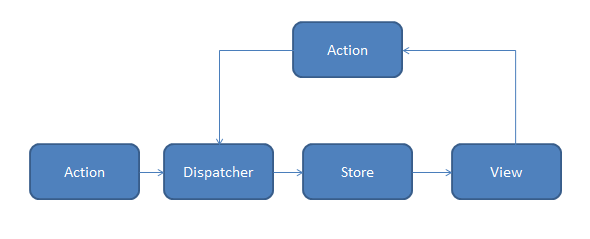
为了更好的管理状态,Redux 将所有状态放置于顶层,所有的 state 都以一个对象树的形式储存在一个单一的 store 中,分发给各个组件。
Redux 推崇 Immutability,接受 action,reducer 接受数据,返回一个全新的 State(Action -> Reducer -> New State),…太繁琐了,算了,进正题 参照其实现一个简单的状态管理
创建模板
在此之前先创建 React 基础模版,为了方便使用的是 CRA!
npx create-react-app app
cd app
mkdir lib/mini-redux # 将在这里存放
npm start
最终 API,简化 Redux API,No Reducer
const state = {
  counter: 0
}

const actions = {
  increment(state, data) {
    state.counter += data
  },
  decrement(state, data) {
    state.counter -= data
  }
}

const Component = (props) => (
  <>
    <h1>{props.counter}</h1>
    <button onClick={props.increment}>+</button>
    <button onClick={props.decrement}>-</button>
  </>
)

connect({
  state: (state) => ({ conter: state.counter }),
  actions: (acions) => ({
    increment: actions.increment,
    decrement: actions.decrement
  })
})(Component)
创建 Store
Redux:单一数据源,全局 store,immutable。 是单一对象数,我们创建一个存放数据/状态(Store)的对象,当然我们不考虑其他的,不同 React-Redux 接受更多参数,他只接受一个 State 和 actions。
export default class Store {
  constructor(state = {}, actions = {}) {
    this.state = this.state
    this.actions = this.rewriteActions(state, actions)
    this.listeners = []
  }

  // 最终 action 是以 xxAction(data) 传入组建使用,所以这里改造一下。
  rewriteActions(state = {}, actions = {}) {
    Object.keys(actions).forEach((key) => {
      const fn = actions[key]
      actions[key] = function (data) {
        fn(state, data) // 这里可以使用 immer 做不可变
        this.listeners.forEach((listener) => listener()) // 当数据更改后执行监听
      }.bind(this)
    })
  }

  subscribe(listener) {
    this.listeners.push(listener)
  }

  unSubscribe(listener) {
    this.listeners = this.listeners.filter((f) => f !== listener)
  }
}
创建 Provider
react-redux 提供了两个重要的对象,Provider 和 connect,前者使 React 组件可被连接(connectable),后者把 React 组件和 Redux 的 store 真正连接起来。
上面差不多就做好了一个简易的 Store,然后我们创建 Store Provider 以提供给 React 各个组件,也就是顶层的 Provider。
import React from 'react';

//创建 Context
const Context = React.createContext(null);

export class Provider extends React.Component {
  render() {
    return (
      <Context.Provider value={this.props.store;}>{this.props.children}</Context.Provider>
    );
  }
}
创建链接组件 Connect
其实就是一个 HOC;
export const connect =
  (_state = () => ({}), _actions = () => ({})) =>
  (Component) =>
    class extends React.Component {
      static contextType = Context
      constructor(props) {
        super(props)
        this.state = {
          store: {}
        }
      }
      componentDidMount() {
        const { state, actions } = this.context

        this.setState({
          store: {
            ..._state(state),
            ..._actions(actions)
          }
        })
      }
      render() {
        return <Component {...this.state.store} />
      }
    }
试试链接起来!
import Store from './mini-redux/store'
import { connect, Provider } from './mini-redux/connect'

const state = {
  counter: 0
}

const actions = {
  increment(state, data) {
    state.counter += data
  },
  decrement(state, data) {
    state.counter -= data
  }
}

const store = new Store({ state, actions })

@connect({
  state: (state) => ({ conter: state.counter }),
  actions: (acions) => ({
    increment: actions.increment,
    decrement: actions.decrement
  })
})
class App extends React.Component {
  render() {
    return (
      <div className="App">
        <p>{this.props.conter}</p>
        <button onClick={() => this.props.increment(1)}>+</button>
        <button onClick={() => this.props.decrement(1)}>-</button>
      </div>
    )
  }
}

ReactDOM.render(
  <Provider store={store}>
    <App />
  </Provider>,
  document.getElementById('root')
)
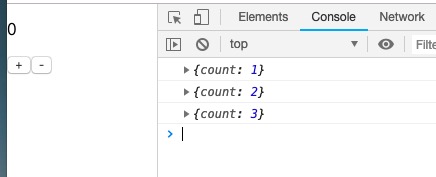
点击 + 号,可以看到我们的 Store 值确实是改变了但是为什么页面没有更新呢?
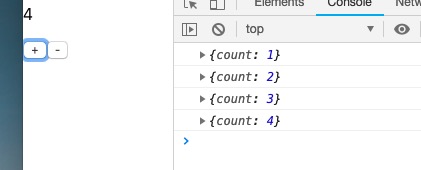
订阅更新
因为 react 更新需要手动调用 setState,所以我们添加订阅,当调用 actions 更新状态时我们对 connect 进行更新(setState)。
// 对 connect 进行改造
    componentDidMount() {
      this.subscribe();
      this.context.subscribe(() => this.subscribe()) // 将组建添加到更新队列
    }

    componentWillMount(){
        this.context.unSubscribe(()=>this.subscribe) //取消监听
    }

    subscribe() {
      const { state, actions } = this.context

      this.setState({
        store: {
          ..._state(state),
          ..._actions(actions)
        }
      })
大功告成!至此就实现了一个极其建议的 redux。
ref: